Setting Up SSO with Microsoft Entra ID
This guide explains how to configure Microsoft Entra ID (formerly Azure AD) to allow users to log in via SAML SSO (via Auth0) into your Sharefox Shop application.
Please follow Steps 1 - 3 below for configuring your Microsoft Entra ID account for the connection.
If you don't have an Auth0 account, follow Step 4 to share the required configuration with our Support. Else, use the same parameters when setting up your own Auth0 account.
Step 1: Log in to Microsoft Entra
- Go to the Microsoft Entra login page
- Sign in or sign up with your Microsoft account.
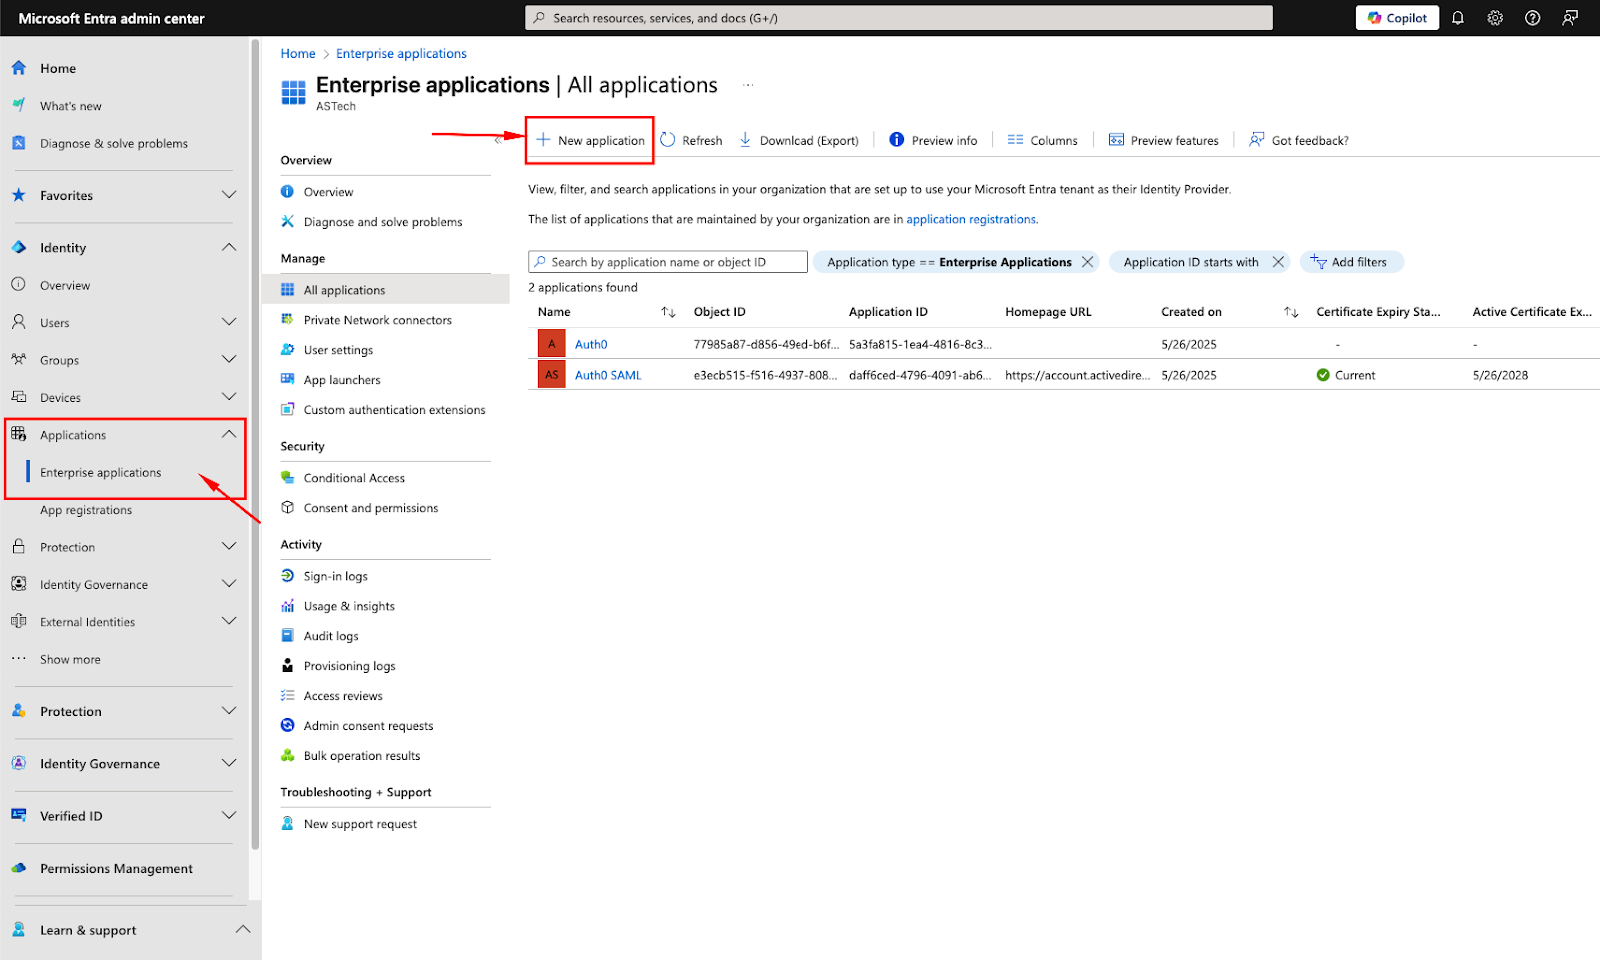
Step 2: Create an Enterprise Application
-
From the left-hand menu, navigate to:
Applications > Enterprise applications
-
Click + New application.
- On the next screen, select Create your own application.
- Enter a name for the application (e.g.,
Auth0 SAML SSO). -
Choose the third option:
Integrate any other application you don’t find in the gallery (Non-gallery).
-
Click Create.


Step 3: Configure SAML Settings
Once the application is created:
-
Go to the Single sign-on section.
Select SAML.

Click Edit under Basic SAML Configuration.
Fill in the following fields:
-
Identifier (Entity ID)
You can enter any unique value (e.g., AUTH0-ID- ) — it just needs to be unique within your Entra tenant.
-
Reply URL (Assertion Consumer Service URL)
This will be provided by our team. Please request it if you haven't received it yet.

-
- Save your changes.


Step 4: Send Us the Following Information
To complete the integration on our end, we’ll need the following details from you:
-
Primary Domain
Go to Home > Overview, then copy your Primary domain.

-
Client ID (Application ID)
Navigate to:
Applications > App registrations > All Applications,
select your application, and copy the Application (client) ID.

- Client Secret
- Within the same application, go to Certificates & secrets.
- Click + New client secret.
- Enter a description and expiration.
- Click Add, then copy the Value immediately — this is the only time it will be visible.


Send us the following copied values:
- Primary Domain
- Client ID
- Client Secret
Then, wait for our Support team to confirm the configuration.